ARchi VR Howto
Start using the ARchi VR app by following a few easy steps: Capture rooms with floor, walls, doors and windows using your iPhone or iPad; merge multiple rooms; automatically generate 2D floor plans and 3D models; and experience captured spaces as Virtual Reality. Upload captured rooms to a Web-based 3D editor in order to add furnitures and simulate realistic lighting.
Content
- AR Room Capturing
- Meta Data
- 2D Floor Plan
- Merge Multiple Rooms
- 3D Space Model
- Virtual Reality
- 3D Editing
- Release Notes
Start Capturing
- Press + sign on top right of start screen.
- An Augmented Reality view will start.
- You see a live video stream from the device camera showing the room you are in.
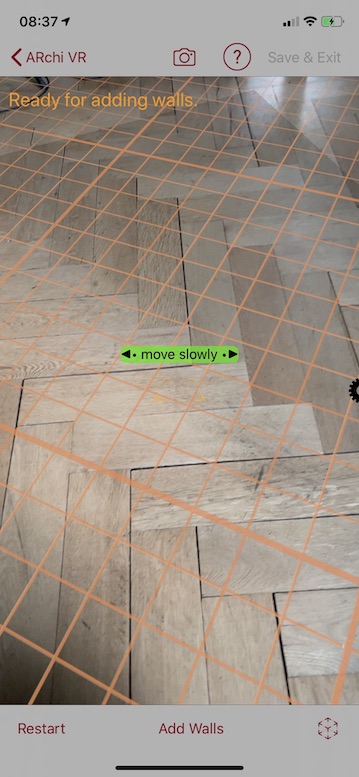
Capture Floor
- Point camera of iPhone/iPad device towards the floor.
- Move camera slowly around the floor.
- Yellow points show detected features.
- Keep going until floor plane is detected.
- The app automatically stops floor scanning when the result is stable.
- You may manually end floor scanning by the "Add Walls" button.
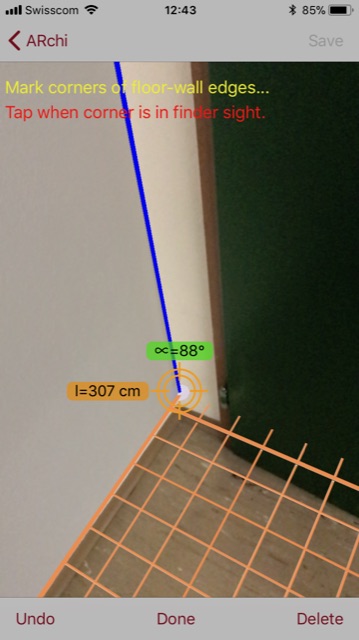
Add Walls
- Mark corners of floor-wall edges by tapping screen when corner is in finder sight.
- Move to the next floor-wall corner while getting feedback on length of wall in cm
- A 10x10cm grid helps you to align the wall.
- After first wall added you will see the angle to the last wall in degrees.
- Angle label turns to green when angle becomes perpendicular.
- With the help of the angle label and the grid it should be feasible to hit wall corners that are hidden by furnitures.
- Close room walls and stop wall capturing automatically by tapping the start corner.
- You may stop wall capturing manually by clicking "Done" button.
- Do stop manually when the room has no closed walls.
Capture Room Height/Ceiling Height
- Point camera towards the ceiling during wall capture process.
- The grid changes to a height ruler going upwards from last corner.
- Height ruler shows a 10cm raster.
- Height label displays height from floor in cm.
- Mark height of wall by tapping screen when ceiling edge is in finder sight.
- The already captured walls change their transparent visualization to the new height setting.
- Future walls of the same room will also have the new height.
- Point camera back to the floor to continue wall capturing.
- The room height (ceiling height) can also be changed later in the Meta Data editor.

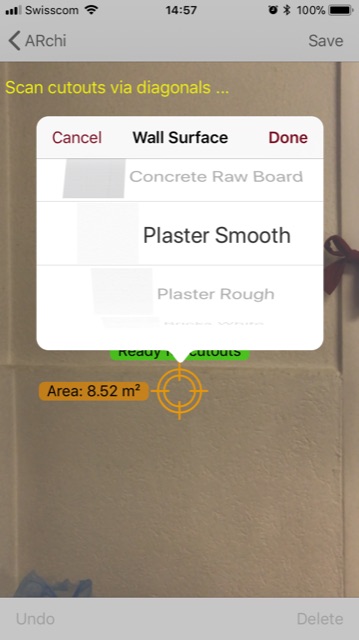
Specify Wall Surface
- Use a long touch to open a selection popup menu by pressing on a wall longer than a second.
- Select the surface of the wall and click "Done".
- The surface will not be displayed in the AR view (the wall stays transparent).
- The surface will then be displayed in the 3D view and the VR view.
|
Concrete Raw Board |

|
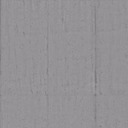
Plaster Smooth |

|
Plaster Rough |

|
Bricks White |
|
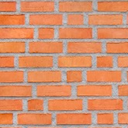
Bricks Red |

|
Tiles Mosaic White |
| Glass |
Add Doors and Windows
- Mark diagonal corners of a door or a window within a wall by tapping screen when the corners are in finder sight.
- While moving to the opposite corner height and width of the cutout are displayed.
- If diagonal goes down to the floor the cutout is interpreted as door, otherwise as window.
- Doors are visualized as yellow-transparent planes with additional symbols to depict the door type.
- Window are visualized as blue-transparent planes without additional type information.
- Press "Undo" button to cancel current capturing process or to delete last captured door or window.
- Press "Delete" to remove all existing cutouts.

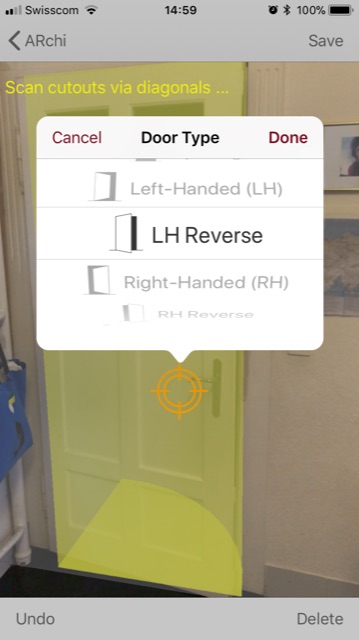
Specify Door Type
- ARchi VR tries to estimate door type, but you can interactively change it.
- Use a long touch to open a selection popup menu by pressing on a door longer than a second.
- Select the door type and click "Done".
- The specific door type will be displayed in the AR view as yellow-transparent 3D symbol.

|
Opening |

|
Left Hand (opens to outside) |

|
Left Hand Reverse (reverse = opens to inside) |

|
Right Hand |

|
Right Hand Reverse |

|
Double Swing |

|
Double Reverse |

|
Left Slide |

|
Right Slide |

|
Double Slide |

|
Window |
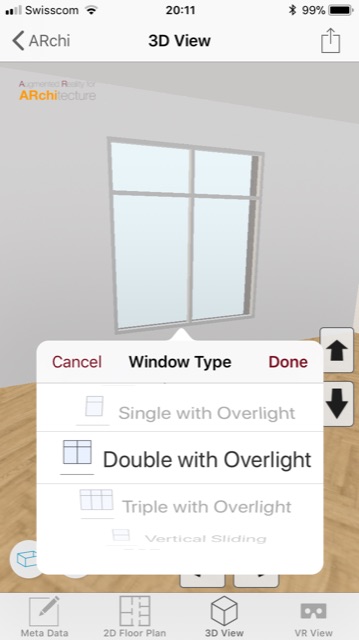
Specify Window Type
- Use a long touch to open a selection popup menu by pressing on a window longer than a second.
- Select the window type and click "Done".
- The specific window type will not be displayed in the AR view (only as a blue-transparent plane).

|
Single |

|
Double |

|
Triple |

|
Single with center bars |

|
Double with center bars |

|
Triple with center bars |

|
Single with overlight |

|
Double with overlight |

|
Triple with overlight |

|
Vertical Sliding |

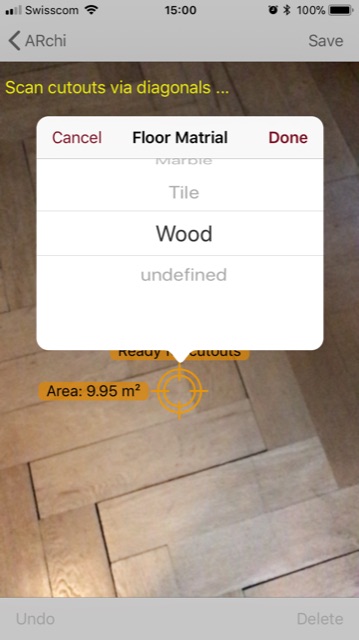
Specify Floor Material & Surface
- Use a long touch to open a selection popup menu by pressing on the floor longer than a second.
- Select the material of the floor and click "Done".
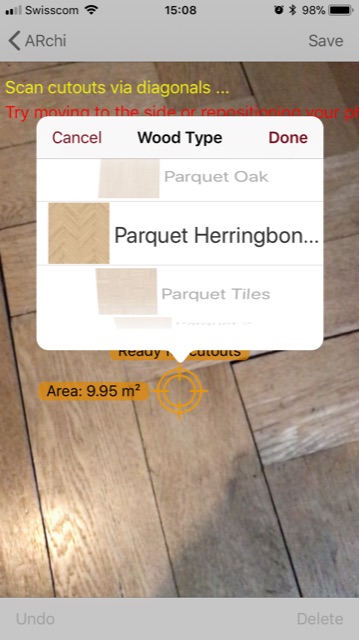
- If the selected material provides several surface options, an additional popup menu appears (e.g., for "Wood").
- The surface of the floor will not be displayed in the AR view.
- The surface will then be displayed in the 3D view and the VR view.
- The floor material and surface can also be changed later in the Meta Data editor for each individual room.

|
Carpet |

|
Concrete |
|
Granite |
|
Laminate |

|
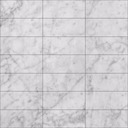
Tiles Checkerboard b/w |
|
Marble |
|
|
Tile |

|
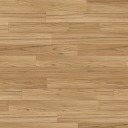
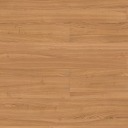
Wood: Parquet Oak |
|
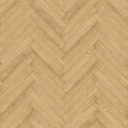
Wood: Parquet Herringbone Oak |

|
Wood: Parquet Tiles |
|
Wood: Parquet 2 |
|
Wood: Parquet 3 |
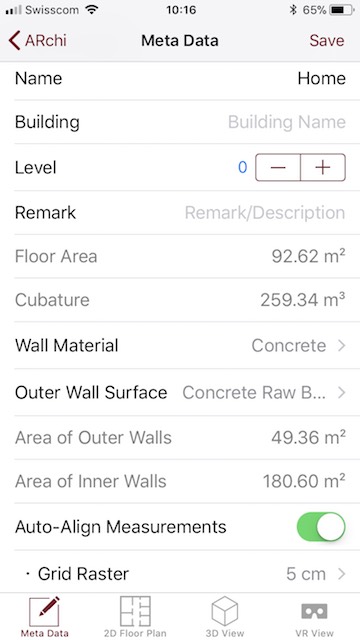
Room and Building Information
- Edit name of room and of building.
- Change room type.
- Change ceiling height.
- Set structural level (floor level).
- Add remark/description to room.
- Edit user name (creator) and organisation.
- Check creation date and device used for room capturing.
Areas and Cubature
- Edit auto-alignment parameters for grid raster and perpendicular angles.
- Changes of auto-alignment parameters does influence 2D and 3D models.
- Auto-calculated floor area
- Auto-calculated room cubature
- Auto-calculated area of outer walls
- Auto-calculated area of inner walls
Materials
- Change material settings of floor, inner walls, and outer walls.
- Changes of materials will be reflected in the 3D and VR views.
Location
- See postal address of room location.
- View room location on map.
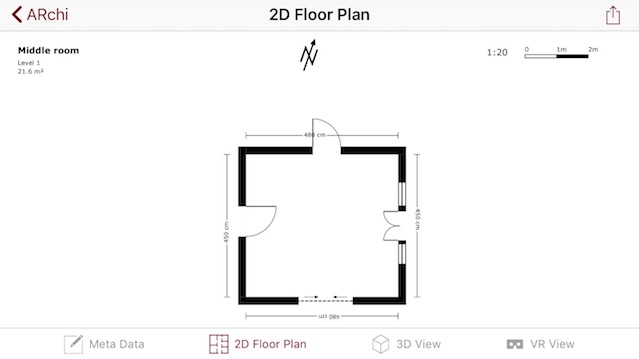
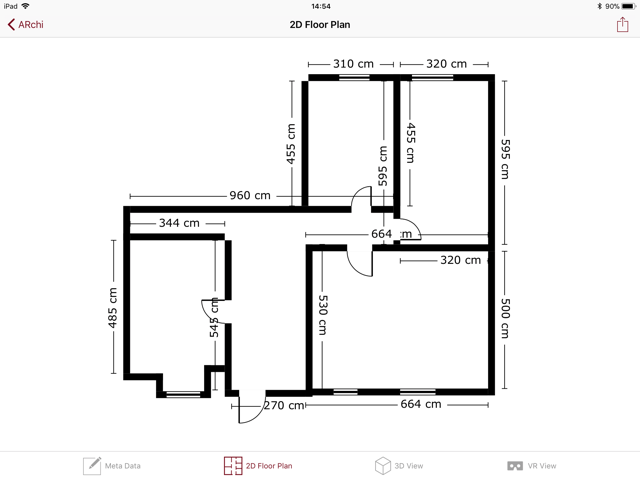
View 2D Floor Plan
- Select a space on start screen.
- Select "2D Floor Plan" tab at the bottom.
- Zoom using standard pinch-in and pinch-out gestures.
- When zoomed in, shift the 2D floor plan using standard shift gestures.
Specify Door Type or Window Type
- If a door or window was not correctly captured in the Augmented Reality view, you are still able to change their type.
- Press on a door or on a window longer than a second within a 2D floor plan.
- Choose door or window type in the popover menu.
- Doors will be displayed accordingly as a specific symbol.
- Windows will NOT be displayed as specific symbol.

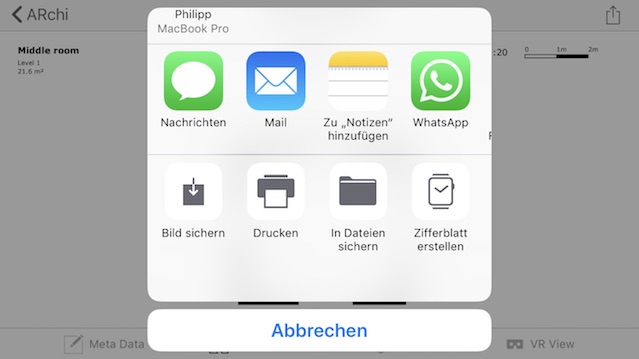
Share 2D Floor Plan
- Press the "Share" button at top right.
- 2D floor plan will be provided as SVG document.
- Choose sharing action such as email, message, save as document, ...
Merge Multiple Rooms
Filter and Select Rooms
- Press bottom left button of start screen.
- Select multiple rooms to merge.
- You may filter rooms by floor level selector.
- You may filter rooms by name of address or building.
Merge selected Rooms
- Press "Merge" button on the bottom right.
- The ARchi VR app automatically generates a new space model.
- Check the result in the 2D floor plan of newly generated model.

| Door Type | Door Counterpart | ||
|---|---|---|---|
|
|
Opening | Opening |
|
|
|
Left Hand | Right Hand Reverse |
|
|
|
Left Hand Reverse | Right Hand |
|
|
|
Right Hand | Left Hand Reverse |
|
|
|
Right Hand Reverse | Left Hand |
|
|
|
Double Swing | Double Reverse |
|
|
|
Double Reverse | Double Swing |
|
|
|
Left Slide | Right Slide |
|
|
|
Right Slide | Left Slide |
|
|
|
Double Slide | Double Slide |
|
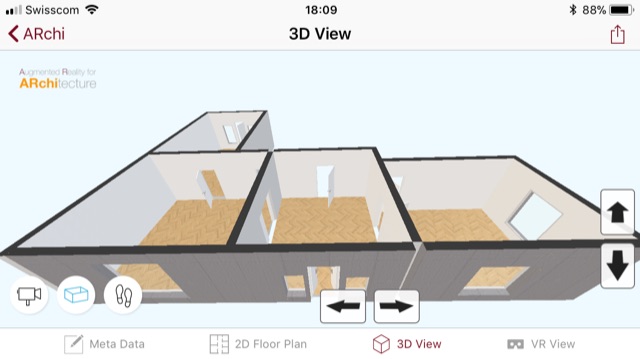
3D Space Model
View 3D Model
- Select a space on start screen.
- Select "3D View" tab at the bottom.
Navigate in 3D View
- Move your iOS device to control yaw and pitch.
- Use the rounded buttons at bottom left to move between rooms (via predefined camera viewpoints), to change to the walk mode, and to change to the birdseye view mode.
- Use the bottns at the center right to move forward and backward.
- Use the bottons at the center bottom to move sidewise left and right.
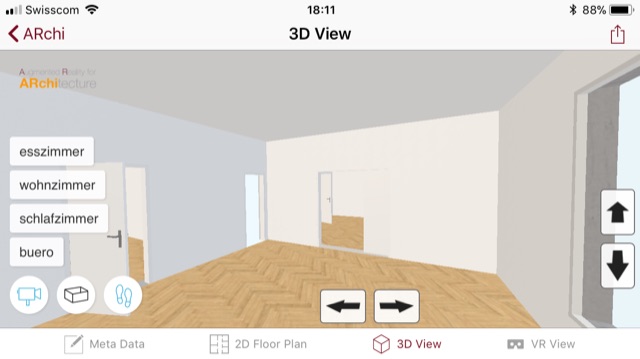
Specify Door, Window or Floor Type
- If a floor, door or window was not correctly captured in the Augmented Reality view, you are still able to change their type.
- Press on the floor, a door or a window longer than a second within a 3D view focusing the element in the middle of the screen.
- Choose door or window type in the popover menu.
- The elements will be displayed accordingly in the 3D view.
Share 3D Model
- Press the "Share" button at top right.
- 3D view will be provided as HTML-based WebVR document.
- Choose sharing action such as email, message, save as document, ...
VR Virtual Reality
Experience VR Model
- Select a space on start screen.
- Select "VR View" tab at the bottom.
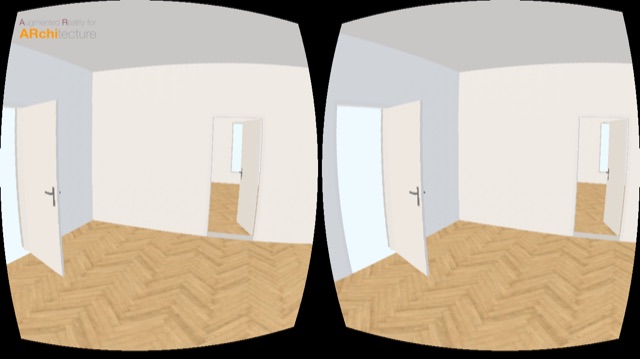
- If you want to use your iPhone within VR glasses (such as Google Cardboard or Cardboard-compatible devices) then click the "VR glasses" button at the bottom right of the VR view.
- Turn your device to landscape mode to enter into stereo VR mode. Tab menu and status bar will disappear.
- Turn your device back to portrait mode to leave VR mode and to get access to the tab menu.
Navigate in VR View
- Move your iOS device (or VR device) to control yaw and pitch.
- Touch the screen to move forward (if enabled in session settings).
- Shake your device to start moving forward (if enabled in session settings).
- Shake again your device to stop moving.
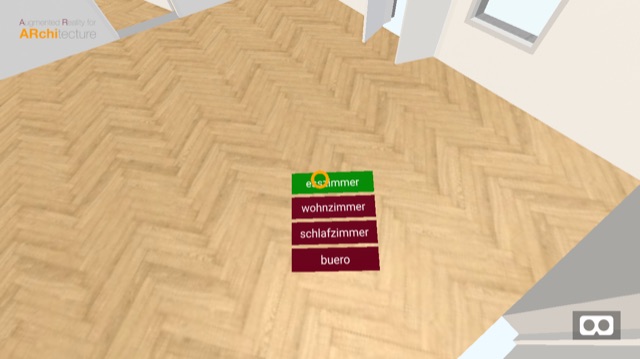
- If you experience a merged multi-room space then a gaze menu (with fuse buttons) is accessible by looking down to the floor (if enabled in session settings).
- By gazing long enough to a menu entry you will fly or be teleported to the selected room.
Share VR Model
- Press the "Share" button at top right.
- The VR experiece will be provided as HTML-based WebVR document.
- Choose sharing action such as email, message, save as document, ...

3D Editing
Upload models to the Archilogic platform
- Register yourself as a user on the Archilogic platform.
- Confirm registration via email link.
- Add user (your email) and password within the "Session Defaults" of the ARchi VR app.
- Now you can upload captured rooms to the Archilogic editor using the "Upload model" button in the "Meta Data" view of any selected model.
- You may upload a model again which will not overwrite the already uploaded model but create a new version.
- You may delete uploaded models on the Archilogic platform.
- You may share uploaded models using public Web URLs.
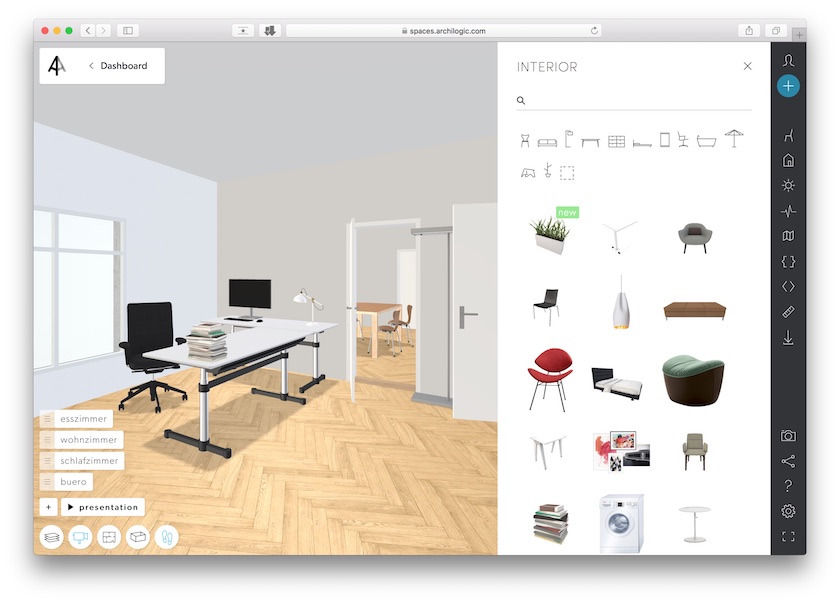
Add Interiors
- Find all your uploaded 3D models in your account at spaces.archilogic.com listed with their postal address.
- Use your desktop Web browser for extensive 3D editing.
- Edit architectural elements such as floors, walls, windows, doors, columns, and stairs.
- Add interior elements using a large furniture library.
- Change parameters such as size, position and materials (colors and textures).
- Include custom 3D objects by importing Wavefront .obj files.
- Add and edit camera viewpoints (bookmarks) and walk-through animation.
- See documentation on the Archilogic 3D editor to get more details.
Simulate realistic lighting
- Simulate realistic lighting based on north and sunlight orientation.
- Adjust the light simulation by changing date, daytime, geographic location and the north orientation of the room.
- Bake the light simulation as textures into the 3D model.
Export and share models
- Export models to various 2D & 3D file formats.
- 2D format: .dxf
- 3D formats: .obj, .fbx, .blend (Blender), .gltf, .3ds, .dae (Collada)
- Use export presets for 3D Studio Max, Archicad, Autocad, Blender, Cinema 4D, Revit, Rhino, SketchUp, and Unity.
- Share your room models via public Web URLs.

Release Notes
Current release of the ARchi VR app is version 1.4
Known Limitations:
- The new ARKit technology used to detect floor planes may generate some inconsistencies during scanning.
- Auto-merge of multiple rooms may produce wrong results.
- Auto-merge may produce overlapping walls (which leads to flickering in 3D).
- Pitched roof areas can not be captured.
- "Tap to walk" in VR view is currently not available.
Being a version 1 release ARchi VR still has some shortcomings, but it may already be fun to use and might create some benefits in cases with no high requirememts for dimension accuracy. Improvements will come soon in future releases.
Ideas for Future Releases:
- Improving auto-merge of multiple rooms
- More architectural elements: column, stair, rails
- Text markers
- Capturing of interior objects (furnitures)
- Adding more intelligent features based on computer vision and machine learning
- 3D Export as IFC
- Share 3D Export on facebook